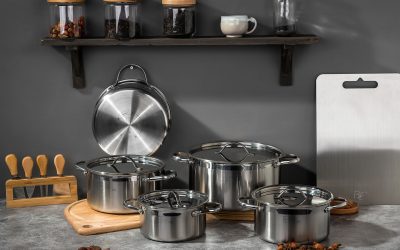

If you open your air fryer accessory drawer and have to dig past three overlapping racks, a warped silicone mat, and a dehydrator tray you have used exactly once, you are not alone. Air fryer accessories multiply fast, and most kitchens simply were not built to store a dozen specialty pans. The good news is that you do not need every gadget on the market to cook well – you need a small, versatile set of tools that pull double and triple duty. This guide shows you how to simplify your air fryer accessory drawer by building your kitchen around just two workhorses: an oven rack and an air fryer crisper tray.
Why Your Accessory Drawer Gets Out of Control
Most accessory clutter happens gradually. You buy an air fryer, then add a baking pan for the first recipe that calls for one, then a silicone liner set, then a rotisserie basket, then a dehydrator tray for one weekend project. Each item solves a single problem, but none of them are interchangeable, so the drawer keeps growing while your actual cooking routine barely changes. The fix is not to buy an organizer bin – it is to rethink which accessories actually earn a permanent spot.
A cluttered drawer also slows you down at dinnertime. When you have to move five pans to find the one you need, you are more likely to skip a technique that would have produced better results, like using a rack to crisp a chicken evenly on all sides. Reducing the number of tools you own means less searching, less cleaning, and a genuinely faster path from raw ingredients to a finished plate.
The Multi-Use Pairing Strategy: Rack Plus Tray
The simplest way to shrink your accessory collection is to standardize on two pieces that cover almost every cooking style: a sturdy metal oven rack and a well-ventilated crisper tray. Together, they replace the need for separate roasting racks, cooling racks, drying racks, and several single-purpose trays.
- Oven rack: elevates food above the basket floor so hot air circulates underneath, works for roasting vegetables, reheating leftovers, drying herbs, and holding skewers.
- Air fryer crisper tray: a perforated, non-stick surface designed to maximize airflow for foods like fries, wings, and breaded proteins, and it stacks neatly with the rack for two-tier cooking.
When you shop with this pairing in mind, look at trusted roundups of oven racks and air fryer crisper trays before adding anything else to your cart. A rack and tray that fit your specific air fryer basket size will outperform three mismatched accessories bought separately.
Step-by-Step: Auditing and Simplifying Your Drawer
- Empty the drawer completely. Lay every accessory out on the counter so you can see exactly what you own, including duplicates and items you forgot about.
- Sort into three piles. Group items as “use weekly,” “use occasionally,” and “haven’t touched in months.” Be honest – an accessory used once for a holiday recipe does not need daily drawer space.
- Identify overlap. Check which items perform the same job. A separate cooling rack and roasting rack, for example, can usually be replaced by one quality oven rack sized for your basket.
- Test the rack-and-tray combo. Cook your next few meals using only the oven rack and crisper tray. Note which recipes genuinely need something else, like a loaf pan for quick breads.
- Retire the redundant pieces. Donate, sell, or store elsewhere anything the rack and tray already cover. Keep only accessories that serve a task neither one can do.
- Reassess specialty trays. If you dehydrate fruit or jerky more than a couple times a month, decide whether a dedicated tray earns a permanent spot or if it should live in a separate storage box until needed.
- Set a one-in-one-out rule. Going forward, only add a new accessory if it replaces something you are removing, so the drawer stays manageable long term.
Getting the Most Out of Your Rack and Tray
Once you have pared down to the essentials, a few habits help the rack-and-tray combo handle almost everything you used to need extra pans for.
- Stack for batch cooking. Place the crisper tray on the basket floor for foods that need direct airflow, then add the rack above it to cook a second layer, such as vegetables on top and protein below.
- Use the rack for reheating. Elevating leftovers on a rack keeps them from steaming in their own moisture, so pizza slices and fried foods come out crisp instead of soggy.
- Rotate for even browning. Because the crisper tray’s perforations promote airflow from below, a quick rotation halfway through cooking evens out browning without needing a rotisserie attachment.
- Line only when necessary. Skip extra parchment liners for most recipes – the tray’s non-stick surface and the rack’s open design usually mean food releases cleanly on its own.
If your cooking regularly includes dehydrating snacks, jerky, or dried fruit, it is worth keeping one specialized tool on hand rather than trying to force the job onto a standard rack. Browse a comparison of air fryer dehydrator trays to find a slim option that stores flat and only comes out for dehydrating sessions, keeping your everyday drawer focused on the rack and crisper tray.
Common Mistakes to Avoid
- Buying accessory bundles for the one piece you need. Bundles often include trays and pans you will never use, adding clutter instead of reducing it.
- Ignoring basket size. A rack or tray that does not match your air fryer’s basket dimensions will wobble, block airflow, or simply not fit, pushing you back toward whatever accessory does fit.
- Keeping accessories “just in case.” If a pan has not been used in six months, it is taking up space that could go to tools you actually reach for.
- Overcrowding the rack or tray. Piling food too high blocks the air circulation that makes these accessories effective in the first place, leading to uneven cooking.
- Skipping regular cleaning. Grease buildup on a rack or tray reduces airflow and can cause smoking; a quick wash after each use keeps performance consistent.
Frequently Asked Questions
Do I really only need an oven rack and a crisper tray?
For most everyday air frying, yes. The two together cover roasting, reheating, crisping, and two-tier batch cooking. Specialty tasks like dehydrating or baking a loaf still benefit from a dedicated tool, but those can be stored separately and used only when needed.
Will an oven rack fit any air fryer basket?
Not automatically – basket shapes and depths vary by brand and model, so measure your basket before buying. Choosing a rack sized specifically for your air fryer prevents wobbling and keeps airflow consistent.
How do I know if a crisper tray is worth keeping over other trays?
A good crisper tray should have generous perforations, a stable non-stick coating, and a size that matches your basket. If it checks those boxes, it can usually replace several single-purpose trays in your current collection.
What should I do with accessories I’m not ready to get rid of?
Move them to a separate storage bin outside the kitchen instead of the accessory drawer. This keeps your daily-use drawer streamlined while still giving you access to occasional-use tools.
How often should I reevaluate my accessory drawer?
A quick audit every few months is enough. Cooking habits shift with the seasons, so revisiting your setup after major holidays or a change in routine helps keep the drawer from creeping back into clutter.
Final Thoughts
Simplifying your air fryer accessory drawer is less about owning fewer things and more about owning the right things. A quality oven rack and air fryer crisper tray can handle the vast majority of what you cook, freeing up drawer space and cutting down on cleanup. Start with an honest audit, commit to the rack-and-tray pairing for a couple of weeks, and only bring back a specialty accessory if you find yourself genuinely missing it. The result is a kitchen setup that is faster to use, easier to clean, and far less overwhelming to open every night.